Amazon Cloud
Comprehensive Guide: How to Install WordPress on AWS
Welcome to our step-by-step guide to installing WordPress on Amazon Web Services (AWS). In this tutorial, we take you through each stage of the process, from setting up an EC2 instance to finally launching your WordPress website on AWS.
Setting Up an AWS Account
Before starting, you need an AWS account. If you don't have one, head over to the AWS Management Console and sign up.
Launching an EC2 Instance
Now that you have your AWS account ready, let's launch an Amazon EC2 instance, which will host your WordPress website.
Launching an EC2 Instance
Now that you have your AWS account ready, let's launch an Amazon EC2 instance, which will host your WordPress website.
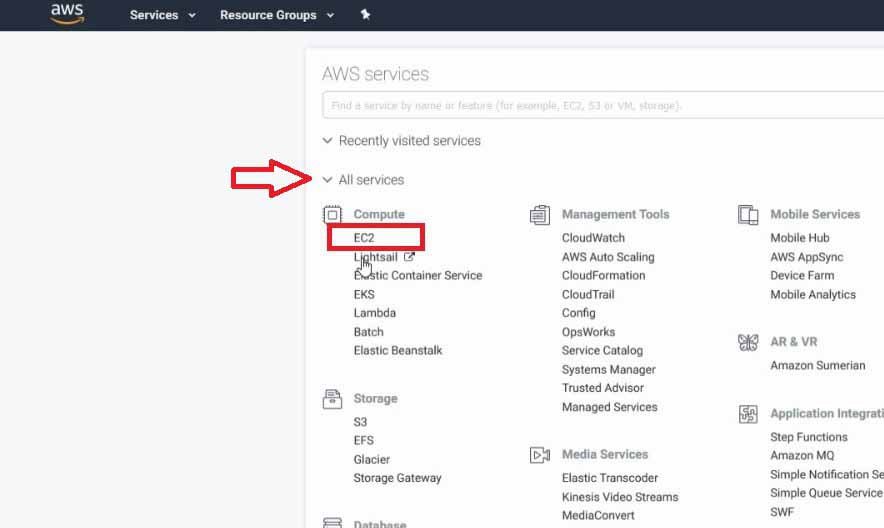
Step 1: Open EC2 Dashboard
Navigate to the AWS Management Console and select EC2 from the list of AWS services. This will redirect you to the EC2 Dashboard.
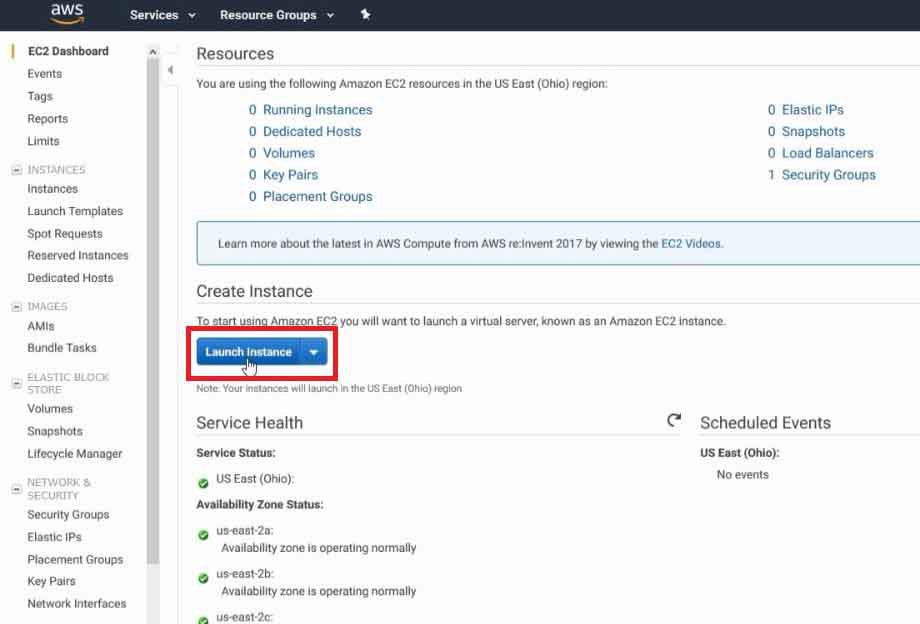
Step2: Launch Instance
Click on ‘Launch Instance', which will bring up a new page where you can select the AWS Marketplace.
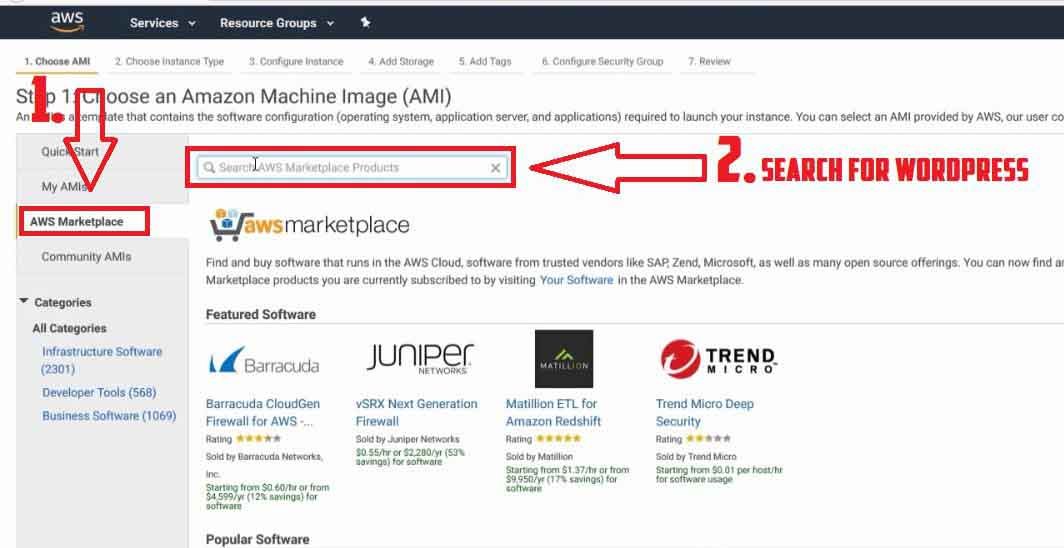
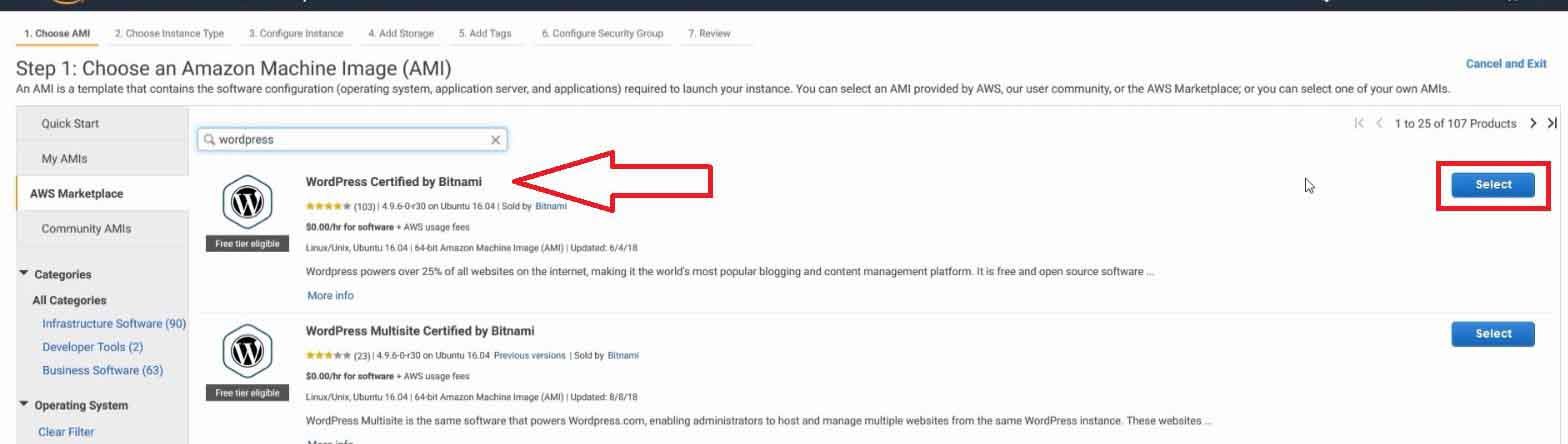
Step 3: Select WordPress
Search for ‘WordPress', and select WordPress certified by Bitmani, Click on ‘Select' to continue.

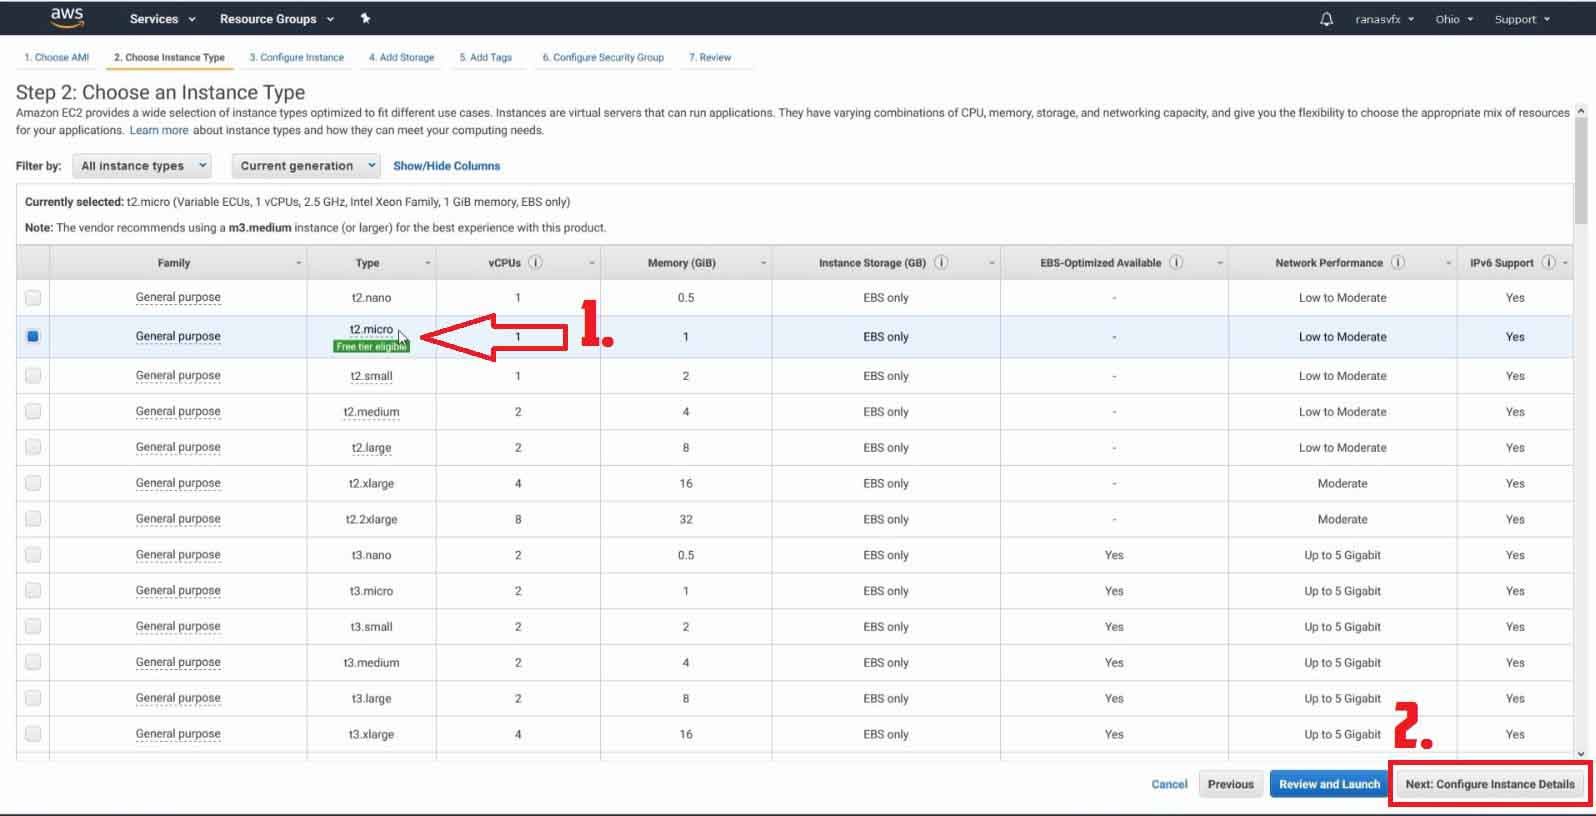
Step 4: Configure Instance Details
Next, you'll configure your instance details. For instance type, a t2.micro instance is suitable for small websites. Make sure your instance is part of a Virtual Private Cloud (VPC) for enhanced security.
Setting Up Your WordPress Website
After successfully setting up the EC2 instance, let's move to installing and setting up WordPress.
Now Enable Auto-assign Public IP.
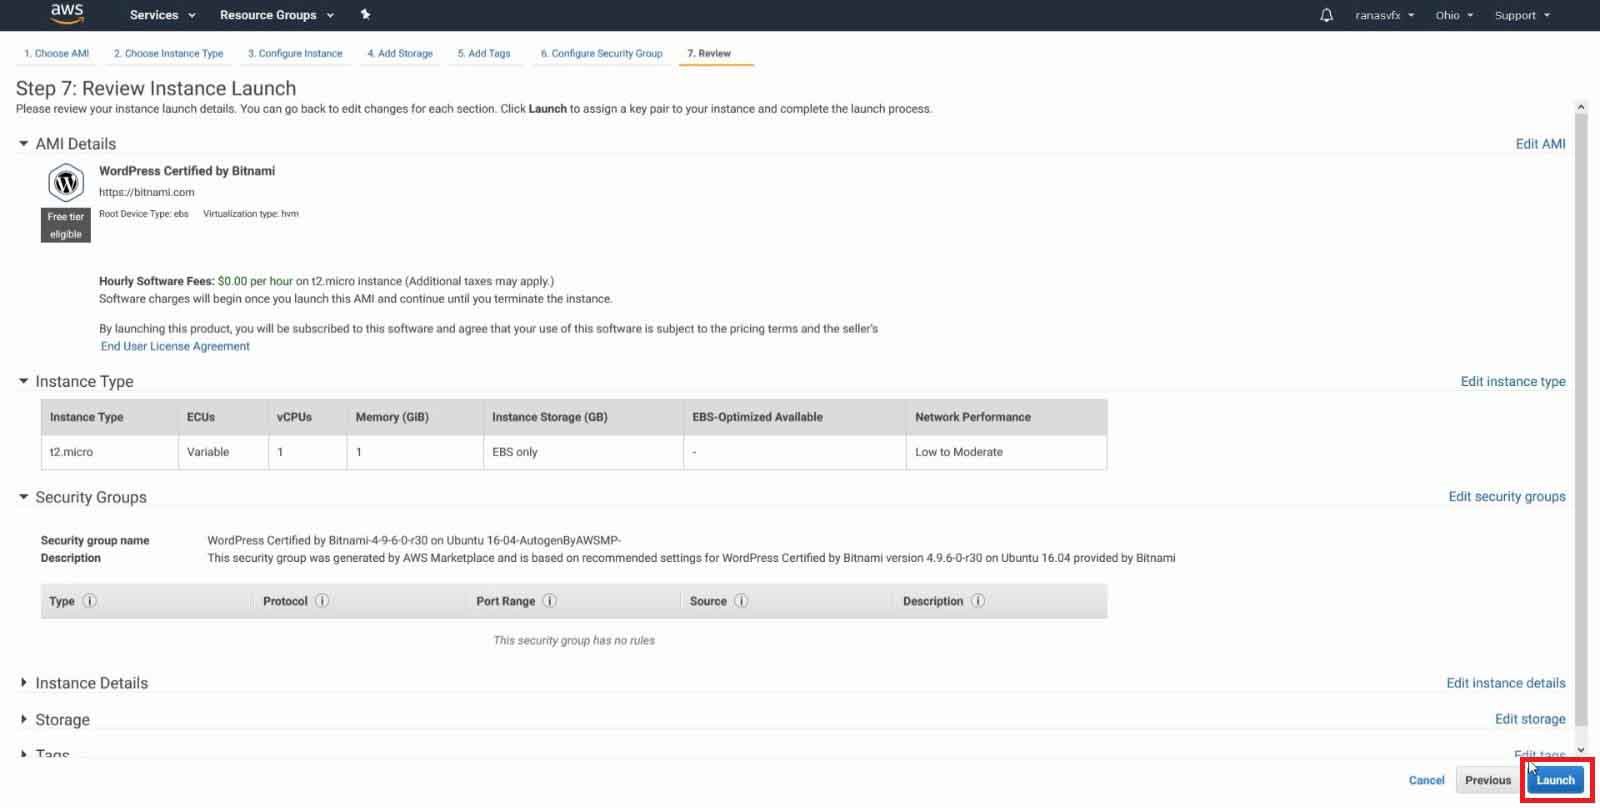
Now click on Review and Launch After Enable the Auto-assign Public IP In the same page.

Click Launch
 On the same Page you will see a pop up small window.
Here it ask you to select your ssh key pair, if you have ssh key pair then you can select that however if you do not have ssh key pair you can create new one by selecting the create a new key pair option from drop down button.
Next you should give a name to your ssh key pair
you can name it whatever you like.
Now download your new ssh key pair by clicking on Download key Pair.
keep you ssh key pair in safe location in you computer or cloud because in later you going to need this ssh key for manage you WordPress files.
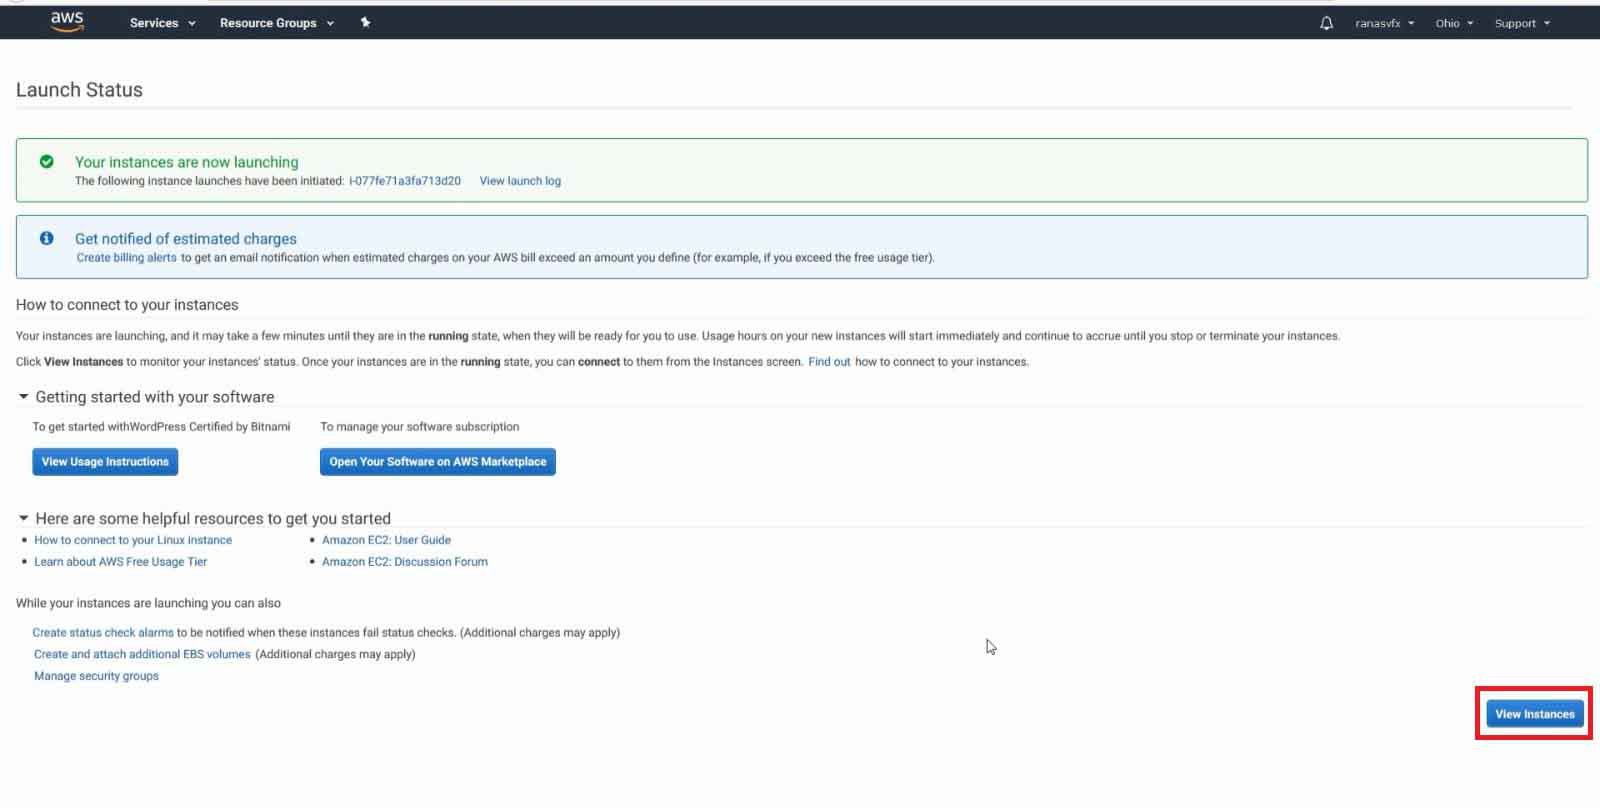
Now click on Launch Instance button after download you new ssh key pair

Congratulation ! Your Instance has been created successfully.
Now click on View Instance.
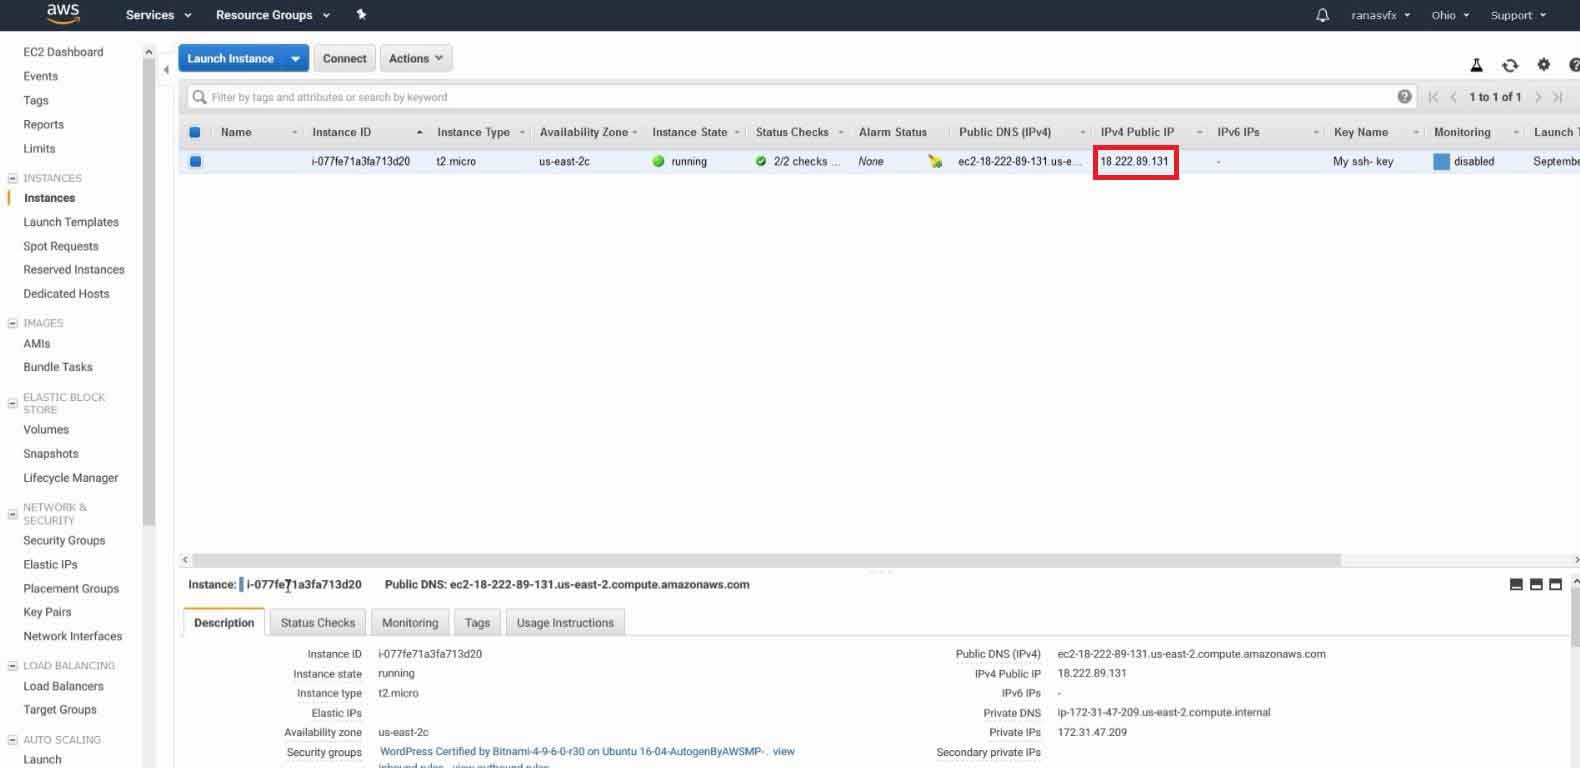
On the Instances tab copy your Instance IPv4 Public IP and keep in safe location, you can past your IPv4 Public IP on Notepad (This would be your WordPress URL)
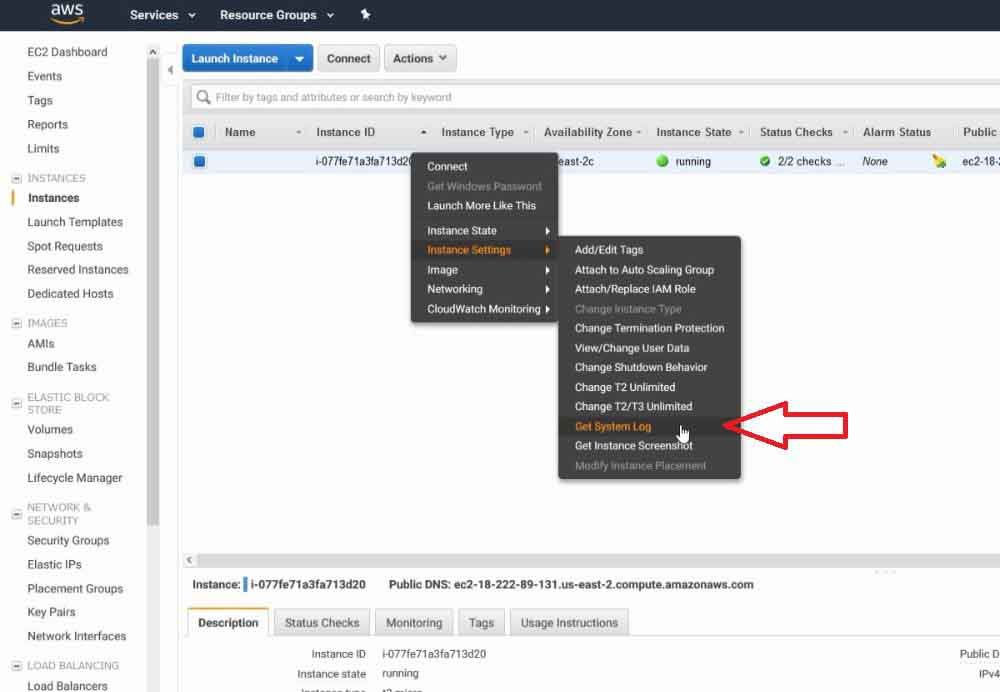
Now Right click on your Instance and go to Instance Settings and then click on Get System Log.
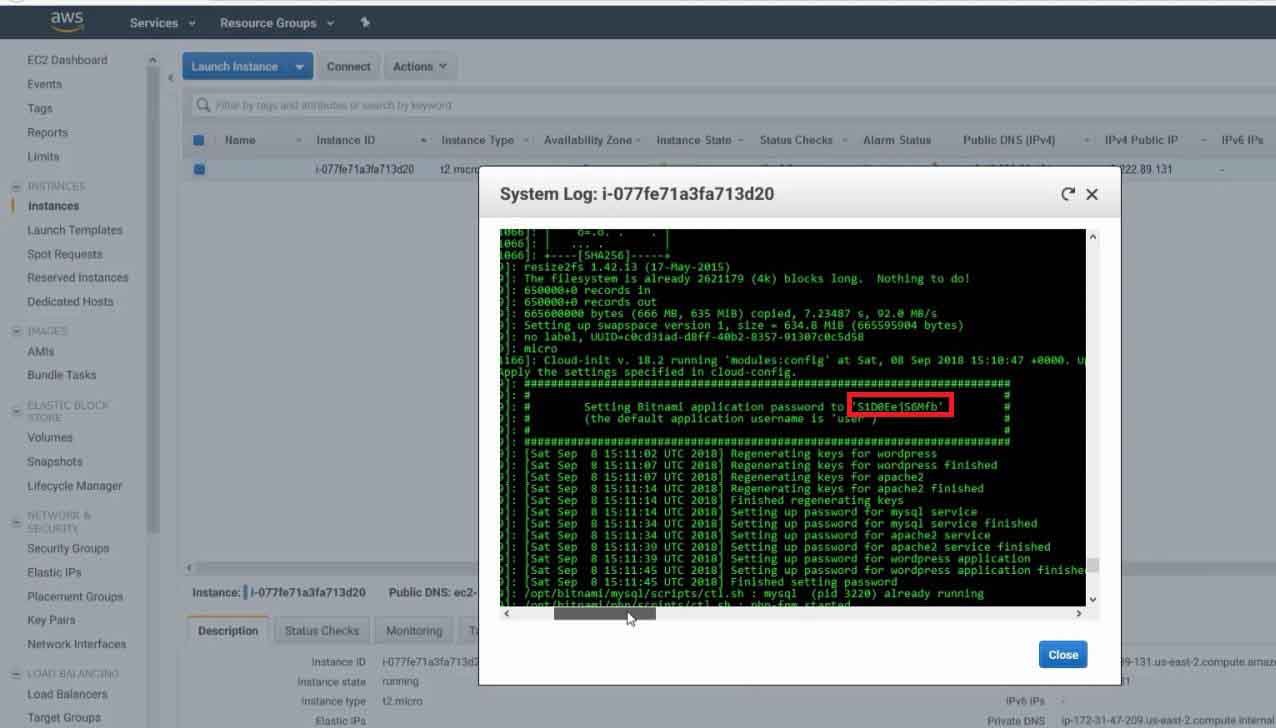
On the same Page you will see a pop up window.
Here scroll down and locate your Bitnami application password and username, this is your WordPress username and password. keep your username and password in safe location.
You should past this information on Notepad.
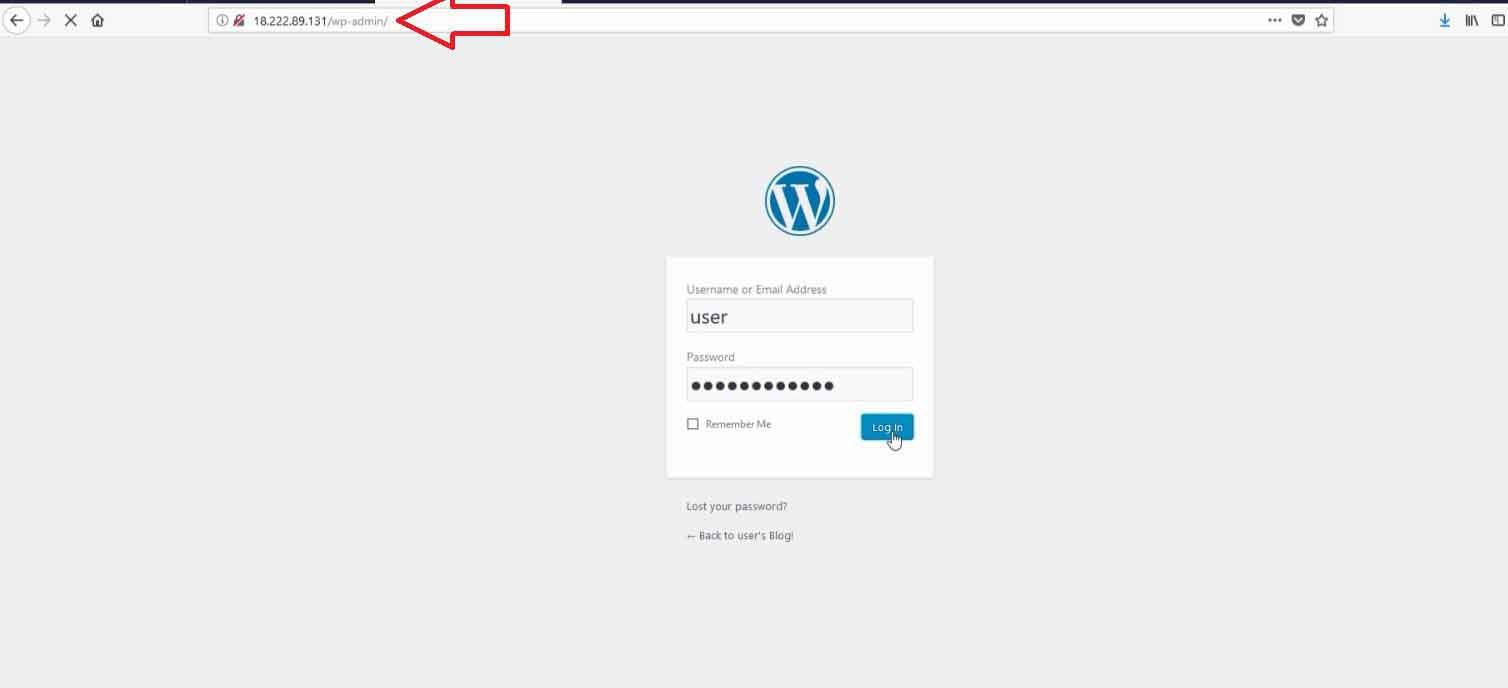
Now its time to open your WordPress website
open up a new tab and past your IPv4 Public IP and without space type /wp-admin and press Enter.
Now you should see WordPress login page here type your username and password that we copied recently.
Lastly click on log In.
Congratulation ! your WordPress website has been created successfully on Amazon web services.
📺 Want to watch video tutorial ?
Note: Your WordPress website now will be open with IP address if you want to point your existing domain with this WordPress website, you should check out this article.
Check out our WordPress tutorials here
Pingback: How to Create A Free Website - with Free domain + hosting 🔥